Visual Inspection for Welding
Welding plays a pivotal role in industries ranging from construction to manufacturing, creating strong and durable joints that are crucial for the integrity of structures and products. Ensuring the quality of these welds is paramount, and one of the most fundamental methods to achieve this is through visual inspection. Visual Inspection, a type of non-destructive testing (NDT), involves a careful examination of welds and their surrounding areas to identify defects and ensure adherence to welding specifications. This article delves into the world of visual inspection for welding, detailing its principles, process, importance, challenges, and advancements.
Introduction to Visual Inspection
Visual Inspection is an integral part of non-destructive testing methods. Unlike destructive testing, which involves destroying a sample to assess its properties, NDT methods like visual inspection allow evaluation without compromising the integrity of the weld. Within NDT, visual inspection holds a distinct place due to its simplicity and directness.
Visual Inspection Process
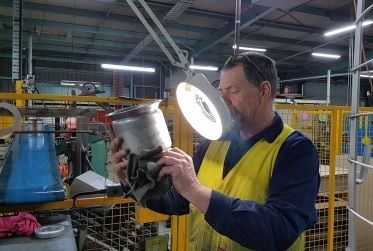
Visual inspection is a meticulous process that involves a step-by-step examination of welds to ensure their quality and integrity. This process can be broken down into several key stages, each serving a crucial role in identifying potential defects and maintaining the desired weld quality.

Pre-inspection Preparations
- Cleaning the Surface: Before initiating the visual inspection, it’s essential to ensure that the weld joint’s surface is clean and free from any contaminants, such as dirt, rust, paint, or oils. Cleaning the surface provides a clear view of the weld and prevents any potential false indications caused by debris.
- Ensuring Proper Access to Weld Joints: Access to the weld joint is necessary for a comprehensive inspection. In some cases, welds may be located in tight spaces or complex geometries that are challenging to access. Ensuring proper access might involve temporarily removing obstacles, creating openings, or using mirrors and cameras to view concealed weld areas.
Examination of Weld Joint Attributes
- Weld Bead Characteristics: The visual inspector starts by assessing the characteristics of the weld bead itself. This involves evaluating the size, shape, and consistency of the bead. A properly executed weld bead should exhibit uniform width, appropriate depth, and proper fusion with the base metals.
- Weld Profile and Shape: The weld’s profile and shape must conform to the specifications outlined in the welding procedure. The inspector checks for proper penetration, reinforcement, and contour. Deviations from the required profile can indicate potential issues with the welding process.
- Weld Discontinuities and Defects: This is the heart of the inspection process, involving the identification of defects that could compromise the weld’s integrity.
Documentation and Reporting
- Record Keeping: Accurate record-keeping is a crucial aspect of the visual inspection process. Inspectors document their observations, including the characteristics of the weld, any identified defects, and their locations. These records serve as a reference for quality control and future assessments.
- Reporting Formats: The inspection findings are typically compiled into a comprehensive report. This report may include images, diagrams, and detailed descriptions of the weld’s condition. Reporting formats can vary based on industry standards, regulations, and the specific requirements of the project or organization.
Common Defects Detected by Visual Inspection
Visual inspection is a fundamental non-destructive testing (NDT) method used to evaluate the quality of welds in various industries. By keenly observing the characteristics of welds and their surrounding areas, inspectors can identify several common defects that could compromise the integrity of welded structures or products. The following defects are frequently detected through visual inspection:
Cracks
Cracks are fractures in the weld material that can significantly weaken the weld joint. They can appear on the surface of the weld or extend beneath the surface layers. Surface cracks are visible to the naked eye, while subsurface cracks might require additional inspection techniques. Cracks can propagate under stress, leading to catastrophic failure, making their detection crucial.
Porosity
Porosity refers to the presence of small voids or gas pockets within the weld metal. These voids can weaken the weld by creating stress concentration points. Porosity is often caused by the entrapment of gases like hydrogen during the welding process. Visual inspection allows inspectors to identify clusters of small holes or gas bubbles, indicating the presence of porosity.
Incomplete Fusion
Incomplete fusion occurs when the weld metal does not properly fuse with the base metal or previous weld pass. This defect creates a weak joint, as the lack of fusion reduces the load-bearing capacity of the weld. Visual inspectors look for indications of incomplete fusion, such as visible gaps or separation between the weld and the base metal.
Undercuts
Undercuts are grooves or depressions along the base metal adjacent to the weld. They are often caused by excessive heat or incorrect welding techniques. Undercuts reduce the effective cross-sectional area of the weld, potentially leading to stress concentration and structural weakness. Inspectors carefully examine the edges of the weld joint to detect any signs of undercutting.
Overlap
Overlap, also known as overlap weld, occurs when the edges of the weld do not properly fuse with the base metal, resulting in a raised, uneven surface. Overlap weakens the weld joint, as it lacks the desired fusion and proper metallurgical bonding. Visual inspection helps inspectors identify overlaps by examining the weld’s surface and assessing the alignment of the joint edges.
Disadvantages of Visual Inspection
Visual inspection is a valuable non-destructive testing (NDT) method for evaluating weld quality, but it also comes with certain limitations that can impact its effectiveness and reliability. Understanding these disadvantages is crucial for implementing appropriate inspection strategies and considering complementary NDT methods when necessary. Here are some key drawbacks of visual inspection in NDT welding:
Limited Depth Detection
Visual inspection is primarily a surface-level examination. Defects hidden beneath the surface layers of the weld might not be visible to the naked eye. Cracks or defects that extend deeper into the weld joint or base material could remain undetected, leading to potential weaknesses that compromise the structural integrity.
Human Subjectivity
The effectiveness of visual inspection can be influenced by the subjective interpretation of the inspector. Different inspectors might have varying levels of experience and interpretations of what constitutes a defect. This subjectivity can lead to inconsistencies in defect identification, making the inspection results less reliable.
Inconsistent Lighting Conditions
Proper lighting is essential for accurate visual inspection. However, lighting conditions can vary depending on the inspection environment, which can affect the inspector’s ability to identify defects. Shadows, reflections, or poor illumination might obscure defects or create false indications, impacting the reliability of the inspection process.
Infeasibility for Certain Materials
Visual inspection might be inadequate or even infeasible for certain materials or welding methods. For instance, materials with rough or textured surfaces might make it challenging to discern defects from the natural surface irregularities. Similarly, inspection of non-metallic materials or dissimilar materials welded together might require additional NDT methods.
Time-Consuming for Large-Scale Inspections
Visual inspection can be time-consuming, especially for large-scale projects with numerous welds to assess. Each weld requires careful scrutiny, which can slow down the overall inspection process. In industrial settings where efficiency is critical, this time investment might be a disadvantage.
Training and Qualification of Visual Inspectors
The competency of visual inspectors is crucial. Training programs, certifications, and hands-on experience contribute to an inspector’s ability to accurately identify defects. Continuous education is essential to keep up with evolving welding techniques and inspection technologies.
Advancements in Visual Inspection Technologies
Technological advancements have bolstered visual inspection. Digital imaging allows for detailed records, and remote inspection minimizes risks in hazardous environments. Enhanced lighting and imaging techniques provide clearer views of weld details. Additionally, visual inspection can be integrated with other NDT methods for a comprehensive assessment.
Conclusion
Visual inspection remains a cornerstone of weld quality assurance. With a rich history and continuous advancements, it ensures the reliability and safety of structures and products across industries. As technology evolves, visual inspection will continue to adapt, ensuring welds meet the highest standards of quality and integrity.
FAQs about Visual Inspection in NDT Welding
What is NDT welding?
NDT welding is a method to examine welds without causing damage to the material, ensuring weld quality.
Can Visual Inspection detect all defects?
While VI is effective at spotting surface defects, some internal issues may require other NDT techniques.
Is Visual Inspection time-consuming?
VI is relatively quick, especially when compared to more elaborate NDT methods.
Can I perform Visual Inspection without training?
Proper training is essential for accurate Visual Inspection results, as inspectors must understand different defects.
How does Visual Inspection complement other NDT methods?
VI often serves as a preliminary inspection, helping determine if further testing methods are required.
Are there industry standards for Visual Inspection in NDT welding?
Yes, organizations like the American Welding Society provide guidelines for conducting VI effectively.
 Welding of Welders All about Welding and Welders


