Proper Joint Preparation for Welding
Welding might seem straightforward, but the quality of your weld largely depends on the preparation work done beforehand. Proper joint preparation is crucial for creating strong, durable welds that can stand the test of time and stress. So, why is it so important? Think of it like the foundation of a building – if the base isn’t solid, the structure will collapse. In welding, joint preparation sets the stage for a flawless bond between metals, reducing the chances of defects and enhancing the overall strength of the welded structure.
What Is Joint Preparation?
Joint preparation refers to the process of preparing the edges of the metal pieces that will be welded together. It involves cleaning, shaping, and sometimes altering the metal surfaces to ensure a strong, uniform weld. There are different types of joints in welding, such as butt joints, corner joints, edge joints, and tee joints. Each requires a different level of preparation depending on the material, thickness, and intended use of the weld.
The goal is to create the ideal conditions for a solid fusion between the base materials, avoiding issues like weak spots or contamination.
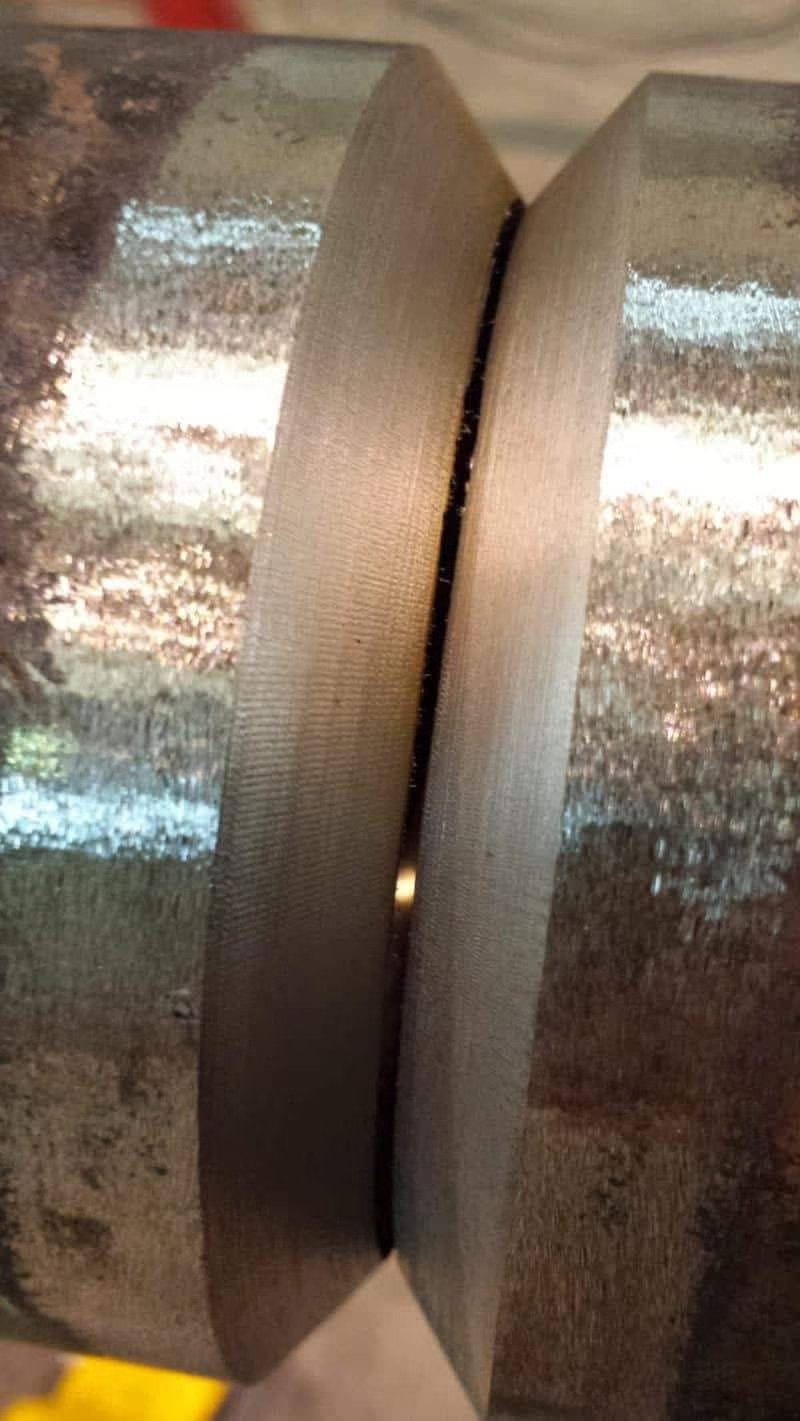
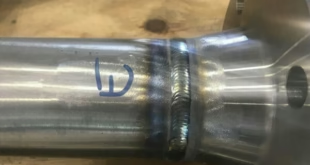
Image credit: https://tiptigwelding.com/
Importance of Joint Preparation in Welding
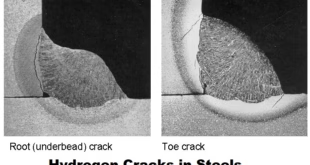
Proper joint preparation directly influences the quality of the weld. If the joints are not prepared properly, it can lead to a number of issues like poor fusion, cracks, or porosity. Essentially, improper preparation can weaken the weld, causing it to fail under stress or over time. Additionally, improper joint preparation can result in excessive spatter, warping, or poor aesthetic finishes.
In short, without the right preparation, your weld is likely to be weak and prone to failure, no matter how skilled you are with the welding torch.
The Basic Steps of Joint Preparation
Proper joint preparation involves several essential steps to ensure the joint is ready for welding. These steps include cleaning the joint area, selecting the correct joint design, and preparing the edges. Here’s a breakdown:
- Choosing the Right Joint Design: The joint type should be suited to the material, its thickness, and the application of the welded structure.
- Cleaning the Joint Area: Contaminants like rust, oil, and dirt can weaken the weld, so thorough cleaning is essential.
- Edge Preparation: This step involves beveling or chamfering the edges to ensure they align correctly during welding.
Step 1: Choosing the Right Joint Design
Before diving into the actual welding process, selecting the right joint design is critical. A butt joint, for example, is suitable for flat, even edges, while a corner joint is more effective for pieces that meet at a 90-degree angle.
The joint design affects not only the strength of the weld but also the ease of the welding process. For thicker materials, you might need a beveled edge to ensure that the welding torch can penetrate fully. The right design ensures that the weld can handle the stresses and conditions it will face.
Step 2: Cleaning the Joint Area
The cleanliness of the joint area is one of the most critical aspects of preparation. Any dirt, oil, rust, or other contaminants on the surface can cause welding defects, such as porosity. Tools like wire brushes, grinders, or chemical cleaners are often used to ensure that the metal is free of impurities.
Using the correct cleaning method will also prevent slag inclusions and other impurities from entering the weld bead, which can weaken the joint. Depending on the materials being welded, abrasive cleaning methods like sandblasting or using a wire wheel are common.
Step 3: Edge Preparation
Edge preparation can involve beveling or chamfering the edges of the metal to allow better penetration of the weld. This is particularly important when welding thicker materials, where the filler metal needs more surface area to bond effectively.
A well-prepared edge helps reduce the chances of incomplete fusion and makes the welding process smoother. Tools like grinders, beveling machines, or torches are typically used for this step.
Common Issues During Joint Preparation
Despite the straightforward nature of joint preparation, welders often face several challenges that can compromise the integrity of the weld. These include:
- Inadequate Cleaning: Any dirt or rust left on the surface can lead to poor weld quality, as it can cause porosity or weak fusion.
- Misalignment of Joints: If the joints are not properly aligned before welding, it can lead to gaps or misfused areas in the weld.
Inadequate Cleaning
Improper cleaning of the joint area is one of the most common issues that can affect weld quality. If contaminants like grease, rust, or paint are left on the joint, they can interfere with the fusion process. To avoid this, always ensure the joint area is properly cleaned before you start welding.
Using a wire brush, grinder, or chemical cleaner will ensure that all contaminants are removed. Regularly check for contamination, especially when working with materials that are prone to oxidation or corrosion.
Misalignment of Joints
Joints that are misaligned can lead to weak or incomplete welds. Misalignment can create gaps or cause the molten metal to pool unevenly, resulting in weak spots. To avoid this, always check the alignment of the joint before welding. Use clamps or fixtures to hold the pieces in place, ensuring they stay aligned during the welding process.
Tools and Equipment for Joint Preparation
The right tools are essential for proper joint preparation. Here’s a list of common tools used in the process:
- Wire Brushes: For cleaning the joint area of dirt and rust.
- Grinders: Used for edge preparation and cleaning.
- Beveling Machines: These machines can bevel edges to the correct angle for welding.
- Plasma Cutters: Useful for cutting and shaping metals before welding.
Each tool plays a unique role in preparing the joint for welding, and it’s important to choose the right tool based on the material and the task at hand.
How Joint Preparation Affects Weld Strength and Durability
Proper joint preparation directly affects the strength and durability of the weld. When the joint is prepared correctly, it allows for better penetration of the weld metal, which results in a stronger bond. Additionally, controlling the gap between the joint ensures that the weld pool is solid and uniform, further improving strength.
For welds to be strong and durable, the joint needs to fit together perfectly with no gaps or misalignments. Proper edge preparation helps reduce the chance of cracks and other defects in the weld.
Best Practices for Joint Preparation
- Cleanliness is Key: Always ensure the joint area is free of contaminants before starting the welding process.
- Bevel Edges as Necessary: For thicker materials, beveling edges ensures better penetration and a stronger weld.
- Align Joints Properly: Misalignment can lead to weak spots or incomplete fusion, so always double-check the joint alignment.
Practice and Experience
As with any skill, practice makes perfect. The more you work on joint preparation, the better you’ll get at it. Experience allows you to identify potential issues early on and make adjustments before they affect the quality of your weld.
FAQs
What is the most important aspect of joint preparation for welding?
The most important aspect is ensuring that the joint area is clean and free of contaminants. Clean surfaces lead to better fusion and stronger welds.
How can improper joint preparation affect my welding project?
Poor joint preparation can lead to weak welds, cracks, and other defects that can compromise the structural integrity of the weld.
What are the best tools for joint preparation?
Tools like wire brushes, grinders, and beveling machines are commonly used for cleaning and preparing joints before welding.
Can joint misalignment be fixed during the welding process?
Misalignment can lead to weak spots and defects, but it can often be avoided by properly aligning the joints before starting the weld.
Why does joint design matter in welding?
The joint design affects the strength of the weld and determines how well the materials will bond together. Different designs are suited for different types of welds and materials.
Conclusion
Proper joint preparation is the foundation of successful welding. By selecting the right joint design, cleaning the surfaces thoroughly, and ensuring precise edge preparation, you set yourself up for a strong and durable weld. Whether you’re a seasoned welder or just starting, paying attention to these details can make a world of difference in the final result.