Acoustic Emission Testing – NDT Inspection
Introduction
Non-Destructive Testing (NDT) refers to a group of methods used to evaluate the properties and integrity of materials, structures, and components without causing damage to them. The primary objective of NDT is to detect defects, discontinuities, and other anomalies that may compromise the functionality, safety, and durability of the inspected object.
Acoustic Emission Testing (AET) is an NDT technique that uses high-frequency sound waves or acoustic emissions to detect and analyze material deformation, crack growth, and other changes in the internal structure of a material or component. AET is widely used in the aerospace, automotive, power generation, and welding industries, among others, to monitor the health and performance of critical components and structures.
Welding is a fundamental process used in the fabrication of many structures and components in various industries, including construction, aerospace, and automotive. Welding defects, such as cracks, porosity, and lack of fusion, can compromise the strength and integrity of welded structures, leading to catastrophic failures. AET provides a reliable, non-destructive method to detect and monitor these defects during and after the welding process, ensuring that the welded structures meet the required quality standards and safety regulations. Moreover, AET can help optimize welding processes by providing real-time feedback on process variables, such as temperature, pressure, and voltage, and identifying the optimal welding conditions that minimize the risk of defects. As such, AET plays a crucial role in ensuring the safety, reliability, and efficiency of welding operations in various industries.
Principles of AET
Definition of Acoustic Emission (AE)
Acoustic Emission (AE) is a phenomenon where materials emit high-frequency acoustic waves or sound waves due to internal changes or deformation. These waves can be detected and analyzed using specialized sensors and equipment, providing information about the material’s internal condition, including the presence of defects, cracks, and other anomalies. In AET, the emitted acoustic waves are typically in the range of 20 kHz to 1 MHz, and the analysis of the waveforms can provide insights into the location, size, and severity of the detected anomalies.

Physical processes and mechanisms of AE in Welding
In welding, AE is generated due to the deformation and stress in the material caused by the welding process. The physical processes and mechanisms that lead to AE in welding include:
- Plastic Deformation During welding, the high heat input causes the material to soften and deform, leading to plastic deformation. This deformation generates AE due to the microstructure changes in the material.
- Crack Formation and Growth Welding can create stress concentration points that can lead to crack formation and growth. The crack formation generates AE due to the release of energy at the crack tips.
- Porosity Formation Welding can also lead to the formation of voids or porosity due to gas entrapment or incomplete fusion. The formation of porosity generates AE due to the sudden release of gas from the voids.
AE parameters and characteristics
In AET, several parameters and characteristics of the AE signal are analyzed to determine the presence and severity of defects or anomalies. These include:
- Amplitude The amplitude of the AE signal corresponds to the energy released during the event that generated the acoustic waves.
- Count The count refers to the number of AE events detected during a specific period, and it can be used to assess the severity and progression of defects.
- Duration The duration of the AE signal reflects the time during which the event generating the waves occurred.
- Rise Time The rise time of the AE signal represents the time required for the signal to reach its maximum amplitude from its initial value.
- Frequency The frequency of the AE signal can provide information about the size and location of the defects, as well as the material properties.
By analyzing these parameters and characteristics, AET can provide valuable information about the internal condition of welded structures, including the presence of defects, the severity of defects, and the location of defects. This information can be used to optimize welding processes and ensure the safety and reliability of welded structures.
Applications of AET in Welding
Detecting Defects in Welding
AET is widely used to detect defects in welding. Defects can compromise the strength, durability, and safety of welded structures, leading to failures or accidents. AET can detect the following defects:
- Cracks AET can detect and monitor the formation and growth of cracks in welded structures. The high-frequency acoustic waves generated by the cracks can be detected by the sensors and analyzed to determine the severity and location of the cracks.
- Porosity AET can detect and monitor the formation of porosity in welded structures. The sudden release of gas from the voids generates high-frequency acoustic waves that can be detected by the sensors and analyzed to determine the severity and location of the porosity.
- Lack of Fusion AET can detect and monitor the lack of fusion in welded structures. The lack of fusion can lead to a weakened joint, compromising the strength and durability of the welded structure. The acoustic waves generated by the lack of fusion can be detected and analyzed to determine the severity and location of the defect.
Monitoring Welding Processes
AET can also be used to monitor welding processes. By analyzing the acoustic emission signals generated during the welding process, AET can provide valuable insights into the following aspects:
- Determining Optimal Welding Conditions AET can be used to determine the optimal welding conditions that minimize the risk of defects. By analyzing the acoustic emission signals, AET can identify the ideal welding parameters, such as temperature, pressure, and voltage, to ensure that the welded joints meet the required quality standards.
- Process Control AET can be used to control the welding process in real-time. The acoustic emission signals can provide feedback on the welding process, allowing adjustments to be made to ensure that the welding parameters remain within the desired range.
- Quality Assurance AET can be used to ensure the quality of the welded joints. By monitoring the acoustic emission signals, AET can detect and analyze any defects that may compromise the strength and durability of the welded structure, ensuring that the structure meets the required quality standards and safety regulations.
AET is a valuable NDT technique for detecting defects and monitoring welding processes. AET can help optimize welding processes, ensure the quality of welded structures, and prevent failures or accidents due to defects. AET is widely used in various industries, including construction, aerospace, and automotive, to ensure the safety, reliability, and efficiency of welded structures.
Equipment Used in AET
Sensors
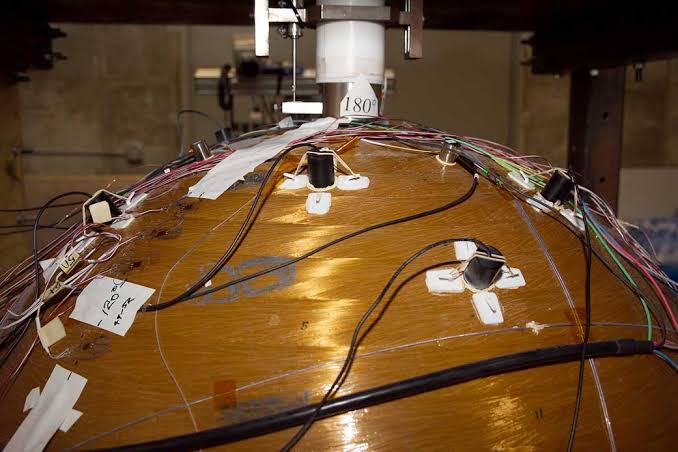
AET sensors are the devices that detect and measure the acoustic waves generated by defects in welded structures. There are several types of sensors used in AET, including:
- Piezoelectric Sensors Piezoelectric sensors are the most commonly used sensors in AET. These sensors use a piezoelectric crystal that generates an electric charge in response to mechanical stress or deformation. When a defect generates acoustic waves in the welded structure, the crystal deforms, generating an electrical signal that can be recorded and analyzed.
- Fiber Optic Sensors Fiber optic sensors use a fiber optic cable to detect acoustic waves. The cable contains a series of tiny mirrors that reflect the light traveling through the cable. When a defect generates an acoustic wave, the mirrors vibrate, causing a shift in the reflected light. This shift can be measured and analyzed to determine the characteristics of the acoustic wave.
Selection criteria for AET sensors include the frequency range, sensitivity, and durability. The sensors must be able to detect the frequency range of the acoustic waves generated by the defects, and they must be sensitive enough to detect even low-level signals. The sensors must also be durable and able to withstand the harsh conditions of the welding environment.
Instrumentation
AET instrumentation is the equipment used to record and analyze the acoustic emission signals detected by the sensors. There are several types of instrumentation used in AET, including:
- AE Amplifiers AE amplifiers amplify the low-level acoustic signals detected by the sensors to a level that can be recorded and analyzed. These amplifiers are highly sensitive and designed to minimize noise and interference.
- Data Acquisition Systems Data acquisition systems record and store the amplified acoustic signals. These systems typically include a signal conditioning module, an analog-to-digital converter, and a computer interface.
Signal processing techniques
Signal processing techniques used in AET include time-domain analysis, frequency-domain analysis, and wavelet analysis. Time-domain analysis is used to analyze the waveform of the acoustic emission signals, while frequency-domain analysis is used to determine the frequency spectrum of the signals. Wavelet analysis is used to identify and analyze transient signals and can provide a more detailed analysis of the acoustic emission signals.
AET equipment includes sensors, amplifiers, data acquisition systems, and signal processing software. The selection of sensors and instrumentation depends on the specific application and the characteristics of the welded structure. AET equipment must be highly sensitive, durable, and capable of detecting and analyzing low-level acoustic signals generated by defects in the welded structure. AET equipment is essential for ensuring the safety, reliability, and quality of welded structures in various industries.
AET Procedure in Welding
Pre-Inspection Before performing
AET on a welded structure, several preparatory steps must be taken. These include:
- Preparation of the test specimen The test specimen must be cleaned to remove any surface contaminants that could interfere with the AET signal. This can be done using solvents, wire brushes, or abrasive pads.
- Selection of the test area The test area must be selected based on the expected defect location or as specified by the applicable welding code or standard. The test area should be representative of the entire welded structure and should include all critical areas.
Inspection
Once the preparatory steps are complete, the AET inspection can begin. This involves the following steps:
- Instrument calibration The AET equipment must be calibrated to ensure accurate and reliable data. Calibration involves adjusting the sensitivity and gain of the sensors and amplifiers, as well as verifying the proper operation of the data acquisition system.
- Data acquisition The AET sensors are placed on the test specimen at the selected test area. The welding process is then initiated, and the sensors detect and record the acoustic emission signals generated by defects in the welded structure.
Post-Inspection
After data acquisition is complete, the AET data is analyzed to determine the presence and characteristics of defects in the welded structure. This involves the following steps:
- Data analysis The AET data is analyzed using signal processing techniques to identify and characterize the acoustic emission signals generated by defects. This can include time-domain analysis, frequency-domain analysis, and wavelet analysis.
- Reporting and interpretation of results The AET data is reported and interpreted to determine the presence and severity of defects in the welded structure. This information is used to determine the acceptability of the weld and to determine any necessary repairs or modifications.
Advantages and Limitations of AET in Welding
Advantages
- AET is a non-destructive testing technique, which means that it does not cause damage to the welded structure being inspected. This makes it an ideal method for inspecting critical or complex welded structures where destructive testing would not be feasible.
- AET allows for real-time monitoring of the welding process, which can help identify defects as they occur. This can help prevent the formation of larger defects that could compromise the safety and reliability of the welded structure.
- AET has high sensitivity and accuracy for detecting small defects in welded structures. It can detect defects that are not visible to the naked eye, such as micro-cracks and porosity, and can accurately locate the defect within the welded structure.
Limitations
- AET requires access to the surface of the welded structure being inspected. This can be challenging in cases where the welded structure is in a difficult-to-reach location or has limited surface access.
- AET requires specialized training and expertise to perform and interpret the inspection results accurately. This can limit its use in situations where trained operators are not available.
- AET equipment can be costly, and the inspection process can be time-consuming. This can limit its use in situations where cost and time are significant factors.
Conclusion
Acoustic Emission Testing (AET) is a non-destructive testing technique that has gained popularity in recent years for inspecting welded structures. It involves the detection of acoustic emissions produced by the welding process or by defects within the welded structure. AET has numerous applications in welding, including detecting defects such as cracks, porosity, and lack of fusion, monitoring the welding process, and quality assurance. The equipment used in AET includes sensors and instrumentation, and the inspection process involves pre-inspection preparation, data acquisition, and post-inspection data analysis. AET has several advantages, including non-destructive testing, real-time monitoring, and high sensitivity and accuracy. However, it also has limitations, such as surface accessibility, operator training, and cost and time.
The future of AET technology looks promising, with advancements in sensor and instrumentation technology, including the development of wireless sensors and portable instrumentation, which could lead to more accessible and versatile AET inspections. Other promising areas of research include the integration of AET with other inspection techniques, such as ultrasonic testing and digital radiography, to improve the detection and characterization of defects. Additionally, the use of artificial intelligence and machine learning algorithms could aid in the analysis and interpretation of AET data, leading to faster and more accurate defect detection. Overall, the future of AET technology in welding looks bright, and it is likely to continue to play an important role in ensuring the safety and reliability of welded structures.
 Welding of Welders All about Welding and Welders


